Creating a DIY glass snowman is an exciting and rewarding project that blends creativity with craftsmanship. Whether you're a seasoned DIY enthusiast or a beginner looking to explore new hobbies, this project offers endless possibilities for personalization and fun. Glass snowmen are not only charming holiday decorations but also timeless pieces of art that can brighten up your home year-round. The process involves shaping and assembling glass pieces into a whimsical snowman figure, which can be customized with colors, patterns, and accessories to match your style. With the right tools and a little patience, you can create a stunning glass snowman that reflects your artistic flair.
What makes DIY glass snowman projects particularly appealing is their versatility. You can use various glassworking techniques such as fusing, slumping, or even stained glass methods to bring your snowman to life. These techniques allow you to experiment with textures, transparency, and finishes, giving your snowman a unique personality. Moreover, working with glass can be a therapeutic and fulfilling experience, as it encourages mindfulness and attention to detail. Whether you're crafting for yourself or as a gift for loved ones, a DIY glass snowman is sure to become a cherished keepsake.
As we dive deeper into this article, you'll discover the tools and materials you'll need, step-by-step instructions, and creative ideas to make your snowman stand out. We'll also explore common challenges and how to overcome them, ensuring your project is a success. By the end of this guide, you'll have all the knowledge and inspiration you need to embark on your DIY glass snowman journey. So, roll up your sleeves, gather your supplies, and let's get started!
Read also:What Is Esfan Discover The Ultimate Guide To Understanding Esfan
Table of Contents
- What Tools and Materials Do You Need for a DIY Glass Snowman?
- How to Get Started with DIY Glass Snowman Projects?
- Step-by-Step Guide to Creating Your DIY Glass Snowman
- Creative Ideas to Personalize Your DIY Glass Snowman
- What Are the Common Challenges in Making a DIY Glass Snowman?
- How to Troubleshoot Problems While Making Your Snowman?
- Why Should You Consider a DIY Glass Snowman as a Gift?
- FAQs About DIY Glass Snowman Projects
What Tools and Materials Do You Need for a DIY Glass Snowman?
Before you begin crafting your DIY glass snowman, it's essential to gather the right tools and materials. Having everything prepared in advance will ensure a smooth and enjoyable crafting process. Let's explore the key items you'll need to bring your snowman to life.
First and foremost, you'll need glass pieces in various shapes and sizes. These can be purchased from craft stores or online suppliers. Look for clear or colored glass sheets, rods, or pre-cut shapes that can serve as the body, head, and accessories of your snowman. Additionally, you'll need a glass cutter to shape the pieces according to your design. Safety goggles and gloves are also crucial to protect yourself while handling sharp materials.
Other essential tools include a kiln for fusing or slumping the glass, a heat-resistant surface for assembling your pieces, and adhesive or soldering materials if you're working with stained glass techniques. Don't forget decorative elements like paint, beads, or metallic accents to add personality to your snowman. With these tools and materials in hand, you'll be well-equipped to start your DIY glass snowman project.
How to Get Started with DIY Glass Snowman Projects?
Starting a DIY glass snowman project can feel overwhelming at first, but breaking the process into manageable steps will make it much easier. The key is to begin with a clear vision of what you want your snowman to look like and then work methodically to bring that vision to life.
Begin by sketching your design on paper. Decide how many sections your snowman will have, what colors you'd like to incorporate, and what accessories you want to add. This design will serve as your blueprint throughout the project. Next, gather your materials and tools, ensuring you have everything you need before you start cutting or assembling the glass. It's also helpful to familiarize yourself with basic glassworking techniques, such as cutting, grinding, and fusing, to avoid mistakes later on.
Once your design and materials are ready, set up a dedicated workspace. Ensure it's well-ventilated, clean, and free from distractions. Lay out your tools and materials in an organized manner to streamline the crafting process. With your workspace prepared and your plan in place, you'll be ready to dive into the hands-on work of creating your DIY glass snowman.
Read also:Sarah Jessica Parker And Chris Noth A Journey Through Fame Talent And Influence
Step-by-Step Guide to Creating Your DIY Glass Snowman
Preparing the Glass Pieces
The first step in creating your DIY glass snowman is preparing the glass pieces. This involves cutting and shaping the glass to fit your design. Start by selecting a glass sheet or rod that matches the size and thickness you need for the snowman's body and head.
Using a glass cutter, carefully score the glass along the lines of your design. Apply gentle pressure to avoid cracking the glass. Once scored, use running pliers to break the glass along the scored line. For smoother edges, use a glass grinder to refine the shapes. If you're working with colored glass, consider layering different hues to create a vibrant and dynamic effect.
After cutting and shaping the glass pieces, clean them thoroughly to remove any dust or debris. This step is crucial, as even small particles can affect the fusing process. Once cleaned, arrange the pieces on a heat-resistant surface to visualize how they'll fit together. This dry run will help you identify any adjustments needed before moving on to the next step.
Assembling the Snowman
With your glass pieces prepared, it's time to assemble your DIY glass snowman. Start by layering the body sections, ensuring they align perfectly. If you're using a kiln, place the assembled pieces on a kiln shelf lined with kiln paper to prevent sticking.
For added stability, you can use glass adhesive to hold the pieces together before fusing. If you're incorporating decorative elements like beads or metallic accents, position them carefully on the glass surface. Be mindful of how these elements will interact with the heat during the fusing process. Once assembled, place the snowman in the kiln and follow the manufacturer's instructions for firing.
After firing, allow the glass to cool completely before removing it from the kiln. Inspect the snowman for any imperfections or areas that need touch-ups. If necessary, you can use paint or other embellishments to enhance the design. With the assembly complete, your DIY glass snowman is ready to be displayed or gifted.
Creative Ideas to Personalize Your DIY Glass Snowman
One of the most exciting aspects of creating a DIY glass snowman is the opportunity to personalize it. By incorporating unique elements and creative touches, you can make your snowman truly one-of-a-kind. Here are some ideas to inspire your customization process.
Consider experimenting with different colors and patterns. For instance, you can use dichroic glass to add a shimmering effect or layer translucent colors to create depth. Adding texture is another way to enhance your snowman's appearance. Use textured glass or etching techniques to give your snowman a frosty, wintery look.
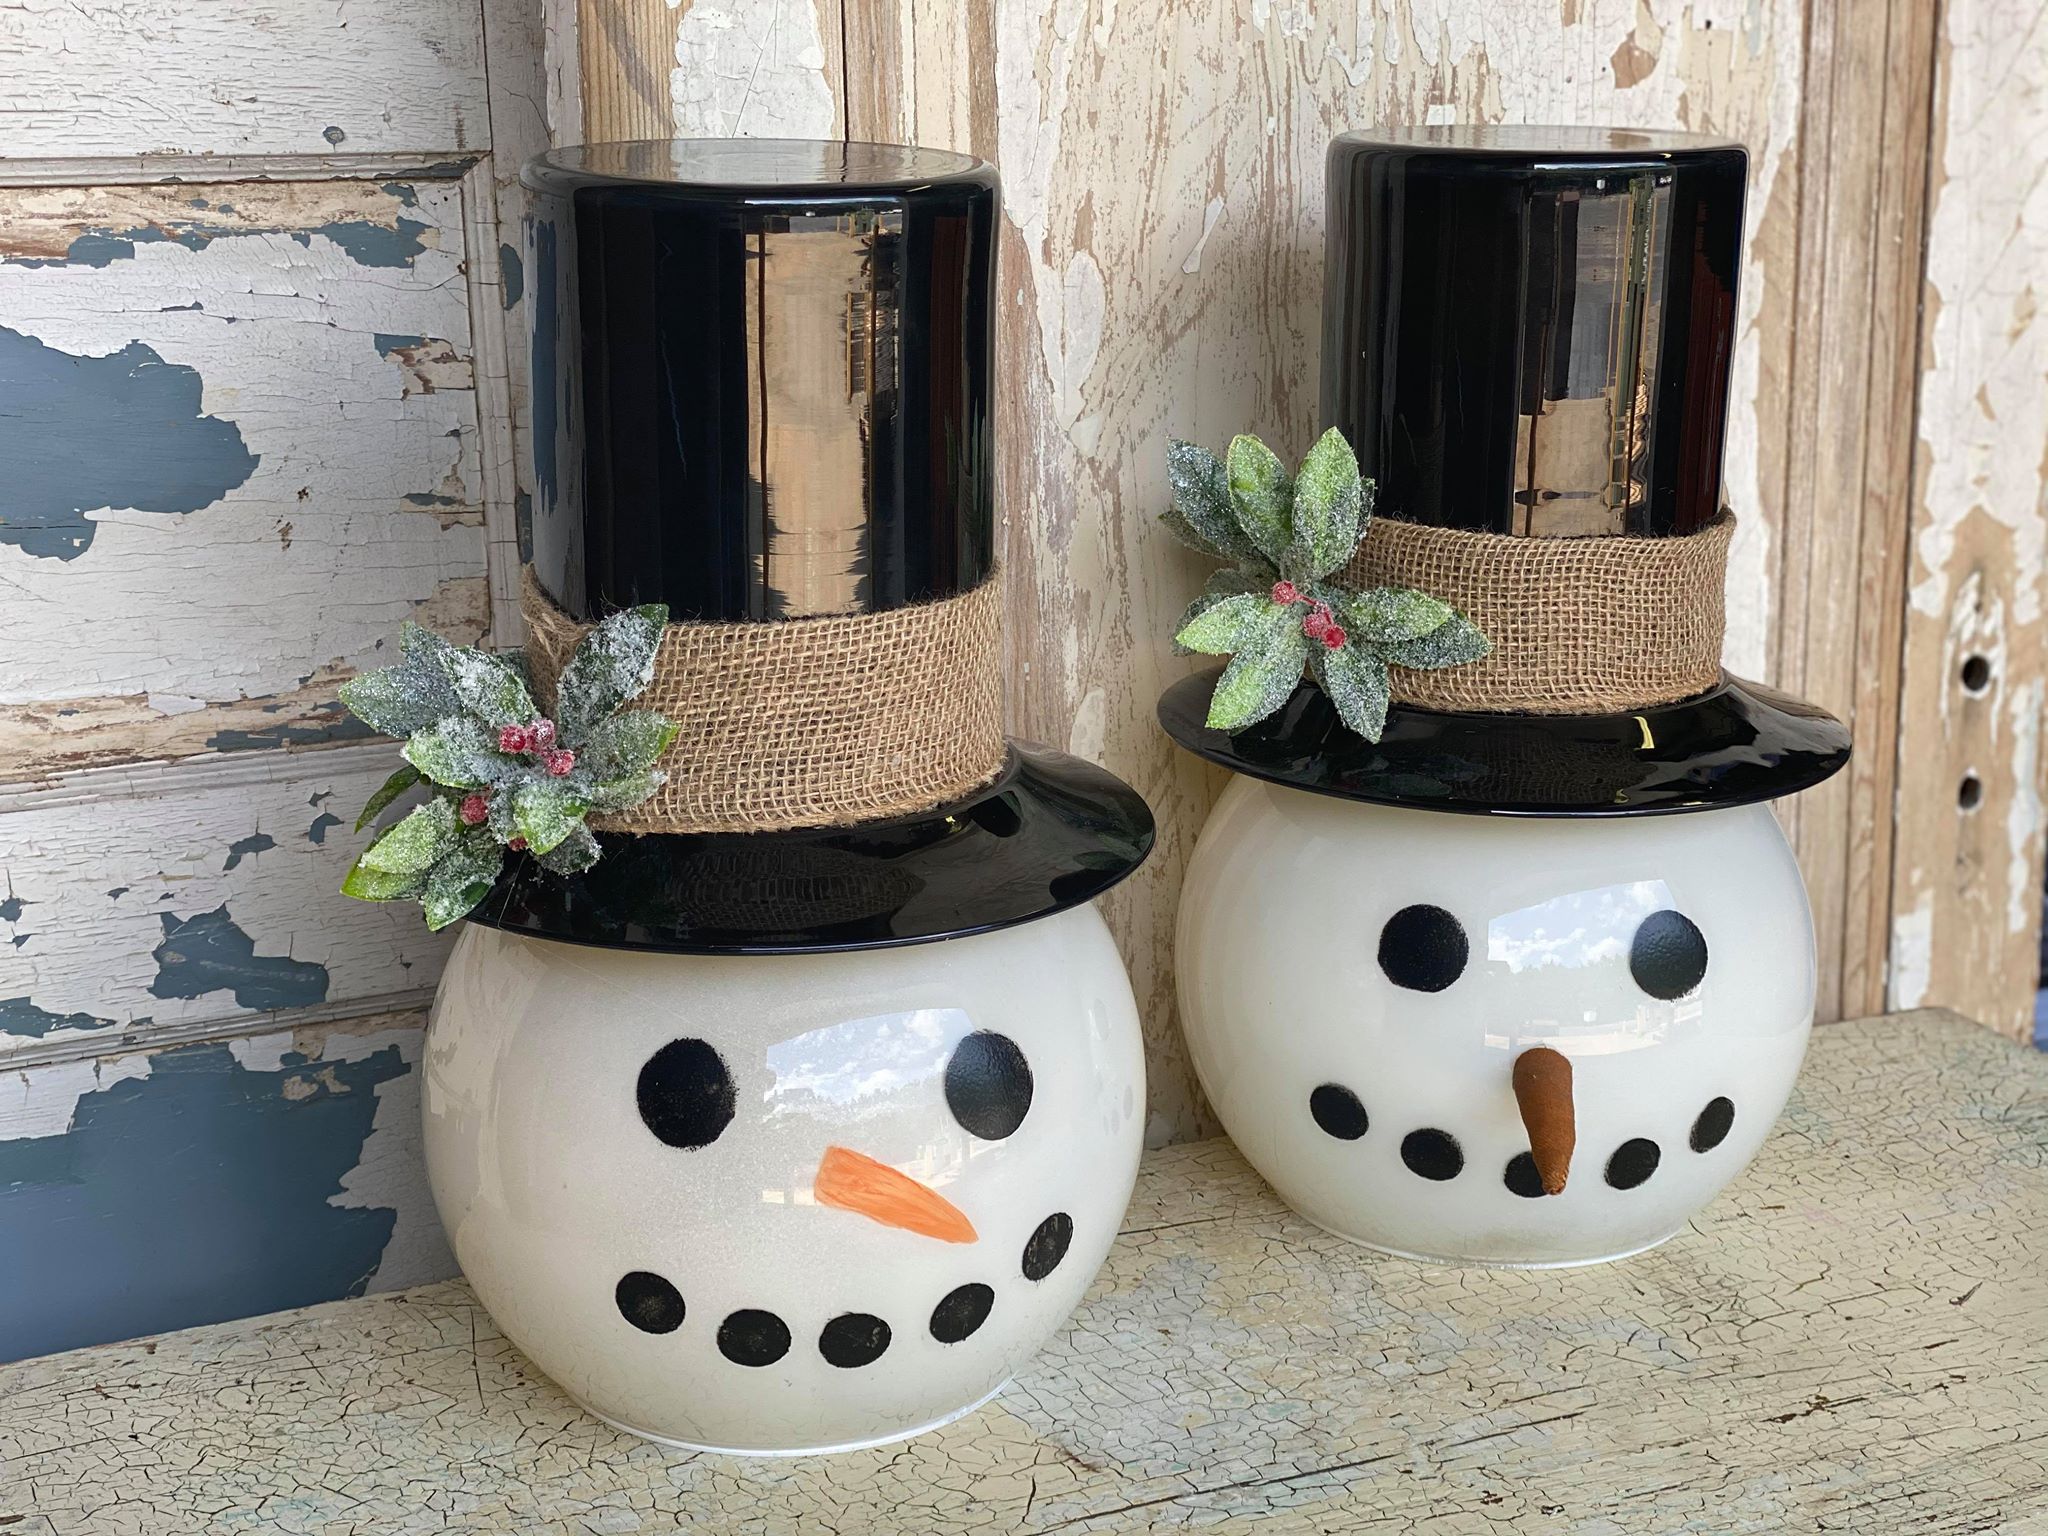
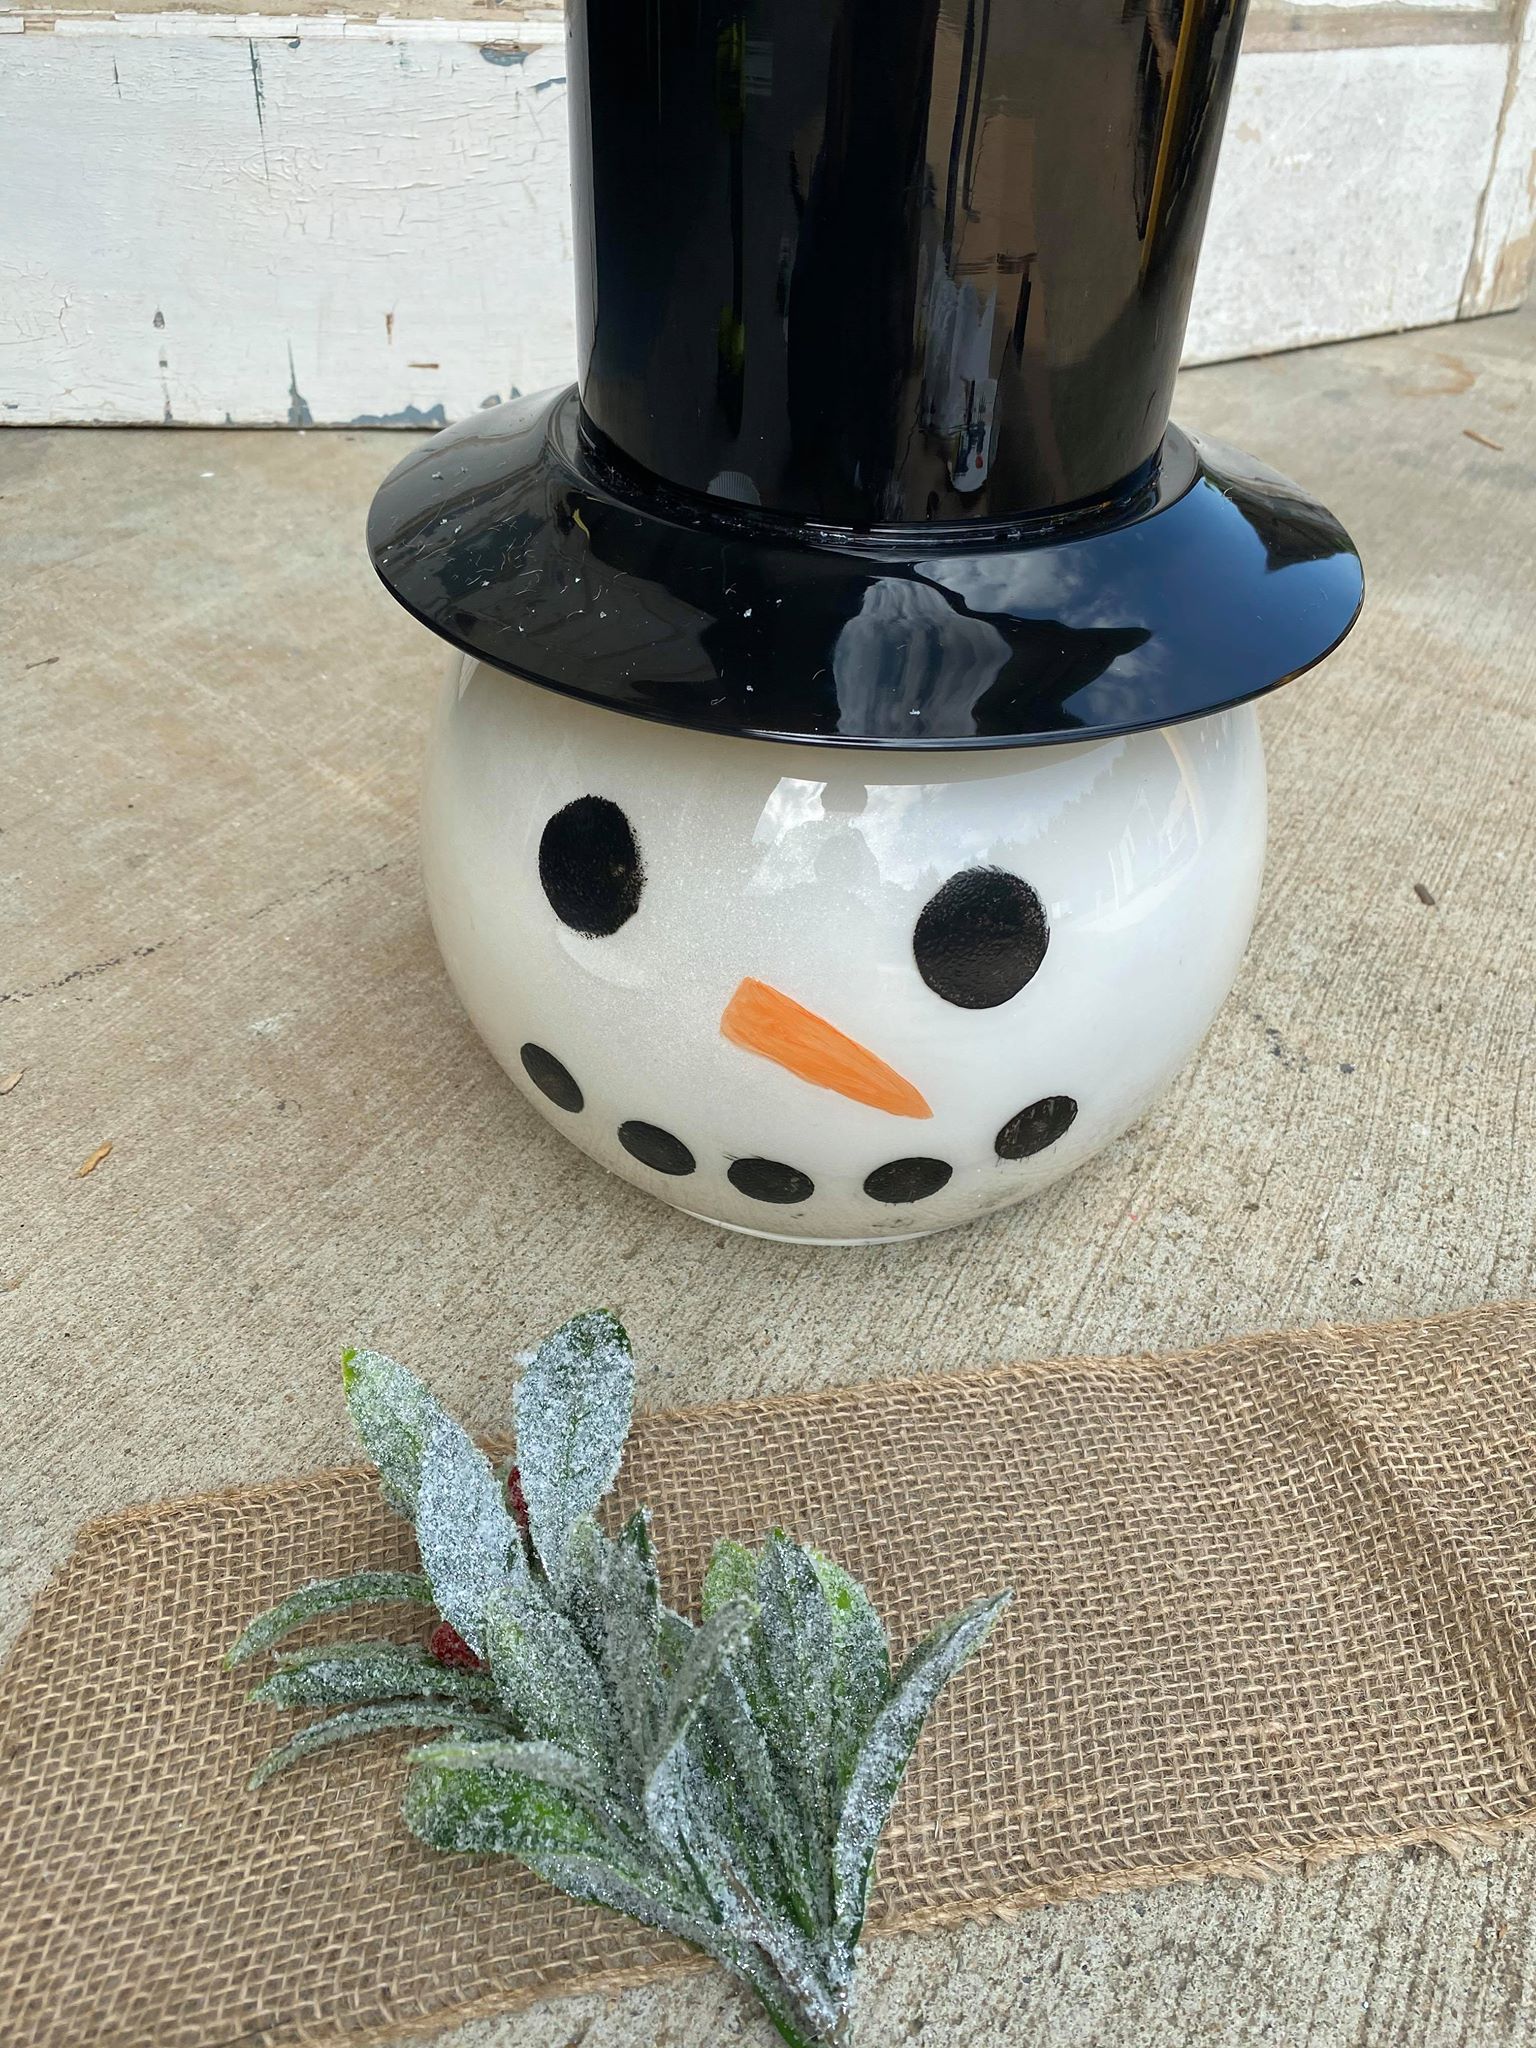
Accessories are another great way to personalize your snowman. Add a scarf made from twisted glass rods, a hat crafted from a small glass dome, or even a carrot nose made from orange-tinted glass. You can also include seasonal elements like holly leaves or snowflakes to give your snowman a festive touch. The possibilities are endless, so let your imagination run wild!
What Are the Common Challenges in Making a DIY Glass Snowman?
While creating a DIY glass snowman is a rewarding experience, it's not without its challenges. Understanding these potential hurdles can help you prepare and overcome them effectively.
One common issue is glass cracking during the fusing process. This can occur if the glass is not properly annealed or if there's a mismatch in the coefficients of expansion between different glass pieces. To prevent this, always use compatible glass and follow the kiln's firing schedule carefully. Another challenge is achieving precise cuts, especially for intricate designs. Practicing your cutting technique on scrap glass can help improve your accuracy.
Additionally, assembling the snowman can be tricky, particularly when aligning multiple pieces. Using a light adhesive or tape to hold the pieces in place before fusing can make this step easier. By anticipating these challenges and planning accordingly, you'll be better equipped to create a flawless DIY glass snowman.
How to Troubleshoot Problems While Making Your Snowman?
Encountering problems while crafting your DIY glass snowman is normal, but knowing how to troubleshoot them can save your project. Here are some common issues and their solutions to help you stay on track.
If your glass cracks during firing, it may be due to thermal shock. To fix this, ensure your kiln is preheated and that the firing schedule includes a slow ramp-up and cool-down phase. For uneven fusing, check that all glass pieces are flat and properly aligned before firing. Using a bubble squeeze technique can also help eliminate air pockets that cause uneven results.
Another issue is difficulty in cutting intricate shapes. If you're struggling, try using a template or stencil to guide your cuts. Additionally, investing in a high-quality glass cutter can make a significant difference. Finally, if your snowman doesn't hold together well after assembly, consider reinforcing it with additional adhesive or soldering. With these troubleshooting tips, you'll be able to address any issues and complete your project successfully.
Why Should You Consider a DIY Glass Snowman as a Gift?
A DIY glass snowman makes an exceptional gift for a variety of reasons. Its handmade nature adds a personal touch that store-bought items simply can't replicate. Whether you're giving it to a friend, family member, or colleague, a glass snowman is a thoughtful and unique present that shows you've put time and effort into creating something special.
Furthermore, glass snowmen are versatile gifts that suit a range of occasions. They're perfect for the holiday season, but their timeless appeal makes them suitable for birthdays, anniversaries, or housewarming gifts as well. You can also customize the snowman to reflect the recipient's personality or interests, making it even more meaningful.
Finally, a DIY glass snowman is a lasting keepsake that can be cherished for years to come. Unlike perishable gifts, glass art retains its beauty and value over time. By gifting a snowman, you're not just giving an object—you're giving a piece of art that carries emotional significance. This makes it a truly unforgettable present.
FAQs About DIY Glass Snowman Projects
What is the best type of glass to use for a DIY glass snowman?
The best type of glass for a DIY glass snowman is fusible glass, which is specifically designed for glass fusing projects. This type of glass has a consistent coefficient of expansion, reducing the risk of cracking during firing.
Can beginners create a DIY glass snowman?
Absolutely! While working with glass requires some practice, beginners can successfully create a DIY glass snowman by starting with simple designs and gradually advancing to more complex projects. Taking a beginner's glassworking class can also be helpful.
How long does it take to make a DIY glass snowman?
The time required to make a DIY glass snowman depends on the complexity of the design and the techniques used. On average, a basic project can take a few hours to complete, including preparation, assembly