Sketching a wolf is not just about replicating its physical form; it’s about conveying its essence—its power, grace, and mysterious allure. Whether you’re a beginner or an experienced artist, learning how to sketch a wolf can be both rewarding and challenging. Wolves are majestic creatures, and their intricate features demand attention to detail. By mastering a few foundational techniques, you can bring this iconic animal to life on paper. From understanding its anatomy to perfecting its expressive eyes, this guide will walk you through every step of the process. Sketching a wolf begins with observation. Wolves are known for their sleek bodies, pointed ears, and piercing gaze. To capture these elements, you need to understand the proportions and structure of their anatomy. This includes studying their posture, facial features, and fur texture. While the task may seem daunting at first, breaking it down into manageable steps makes it easier to tackle. You don’t need to be a professional artist to get started—just a willingness to learn and practice. With the right guidance, you’ll soon discover that sketching a wolf is not only achievable but also deeply satisfying. In this article, we’ll explore everything you need to know about how to sketch a wolf, from basic outlines to advanced shading techniques. We’ll also address common challenges artists face and provide actionable tips to help you overcome them. Whether you’re sketching for fun, honing your skills, or creating a piece for your portfolio, this guide will equip you with the tools and knowledge to succeed. So grab your pencil and paper, and let’s dive into the fascinating world of wolf sketching.
- Why Sketching a Wolf is a Great Artistic Challenge?
- How to Prepare Your Materials for Sketching a Wolf?
- Understanding the Anatomy of a Wolf
- Step-by-Step Guide: How to Sketch a Wolf
- What Are the Best Techniques for Shading a Wolf Sketch?
- How to Add Realism to Your Wolf Sketch?
- Common Mistakes to Avoid When Sketching a Wolf
- Frequently Asked Questions About Sketching a Wolf
Why Sketching a Wolf is a Great Artistic Challenge?
Sketching a wolf is more than just drawing an animal—it’s an exercise in precision, observation, and creativity. Wolves are complex subjects due to their dynamic forms and intricate details. Their elongated bodies, sharp facial features, and textured fur require a keen eye and steady hand. For artists, this presents an opportunity to push their skills to new heights. The challenge lies in capturing not only the physical likeness of the wolf but also its spirit and energy. This makes sketching a wolf a rewarding endeavor for anyone looking to grow their artistic abilities.
Why Is Understanding Proportions Important When Sketching a Wolf?
Proportions are the foundation of any realistic sketch, and this is especially true for wolves. Understanding the relationship between different parts of the wolf’s body ensures that your drawing looks balanced and natural. For example, a wolf’s head is typically about one-third the length of its body, while its legs are long and slender, designed for speed and agility. By mastering proportions, you can avoid common pitfalls like making the head too large or the legs too short. This attention to detail will make your wolf sketch more lifelike and visually appealing.
Read also:Sarpinos Fort Lauderdale A Slice Of Authentic Italian Pizza In The Heart Of Florida
How Can Observing Real Wolves Improve Your Sketch?
Observing real wolves, whether in person, through photographs, or videos, is invaluable for improving your sketch. Pay attention to how they move, how their fur flows with their body, and how their expressions change. These observations will help you add authenticity to your work. For instance, wolves often have a focused, intense gaze that can be challenging to replicate. By studying their eyes and facial muscles, you can learn to convey emotion and depth in your sketches.
How to Prepare Your Materials for Sketching a Wolf?
Before you begin sketching, it’s essential to gather the right materials. The tools you use can significantly impact the quality of your work. Start with a set of high-quality pencils, ranging from hard (H) to soft (B) leads. Hard pencils are ideal for light outlines, while soft pencils allow for rich shading and texture. Additionally, choose a smooth, heavyweight paper that can handle erasing and layering without tearing. Having a good eraser and a blending tool, such as a tortillon or blending stump, is also crucial for achieving smooth gradients.
What Are the Best Lighting Conditions for Sketching a Wolf?
Lighting plays a vital role in setting the mood and enhancing details in your sketch. Natural light is often the best choice, as it provides even illumination and reduces glare. If you’re working indoors, position your workspace near a window or use a daylight lamp to mimic natural lighting. Proper lighting will help you see subtle details in your reference images and ensure that your shading is consistent and accurate.
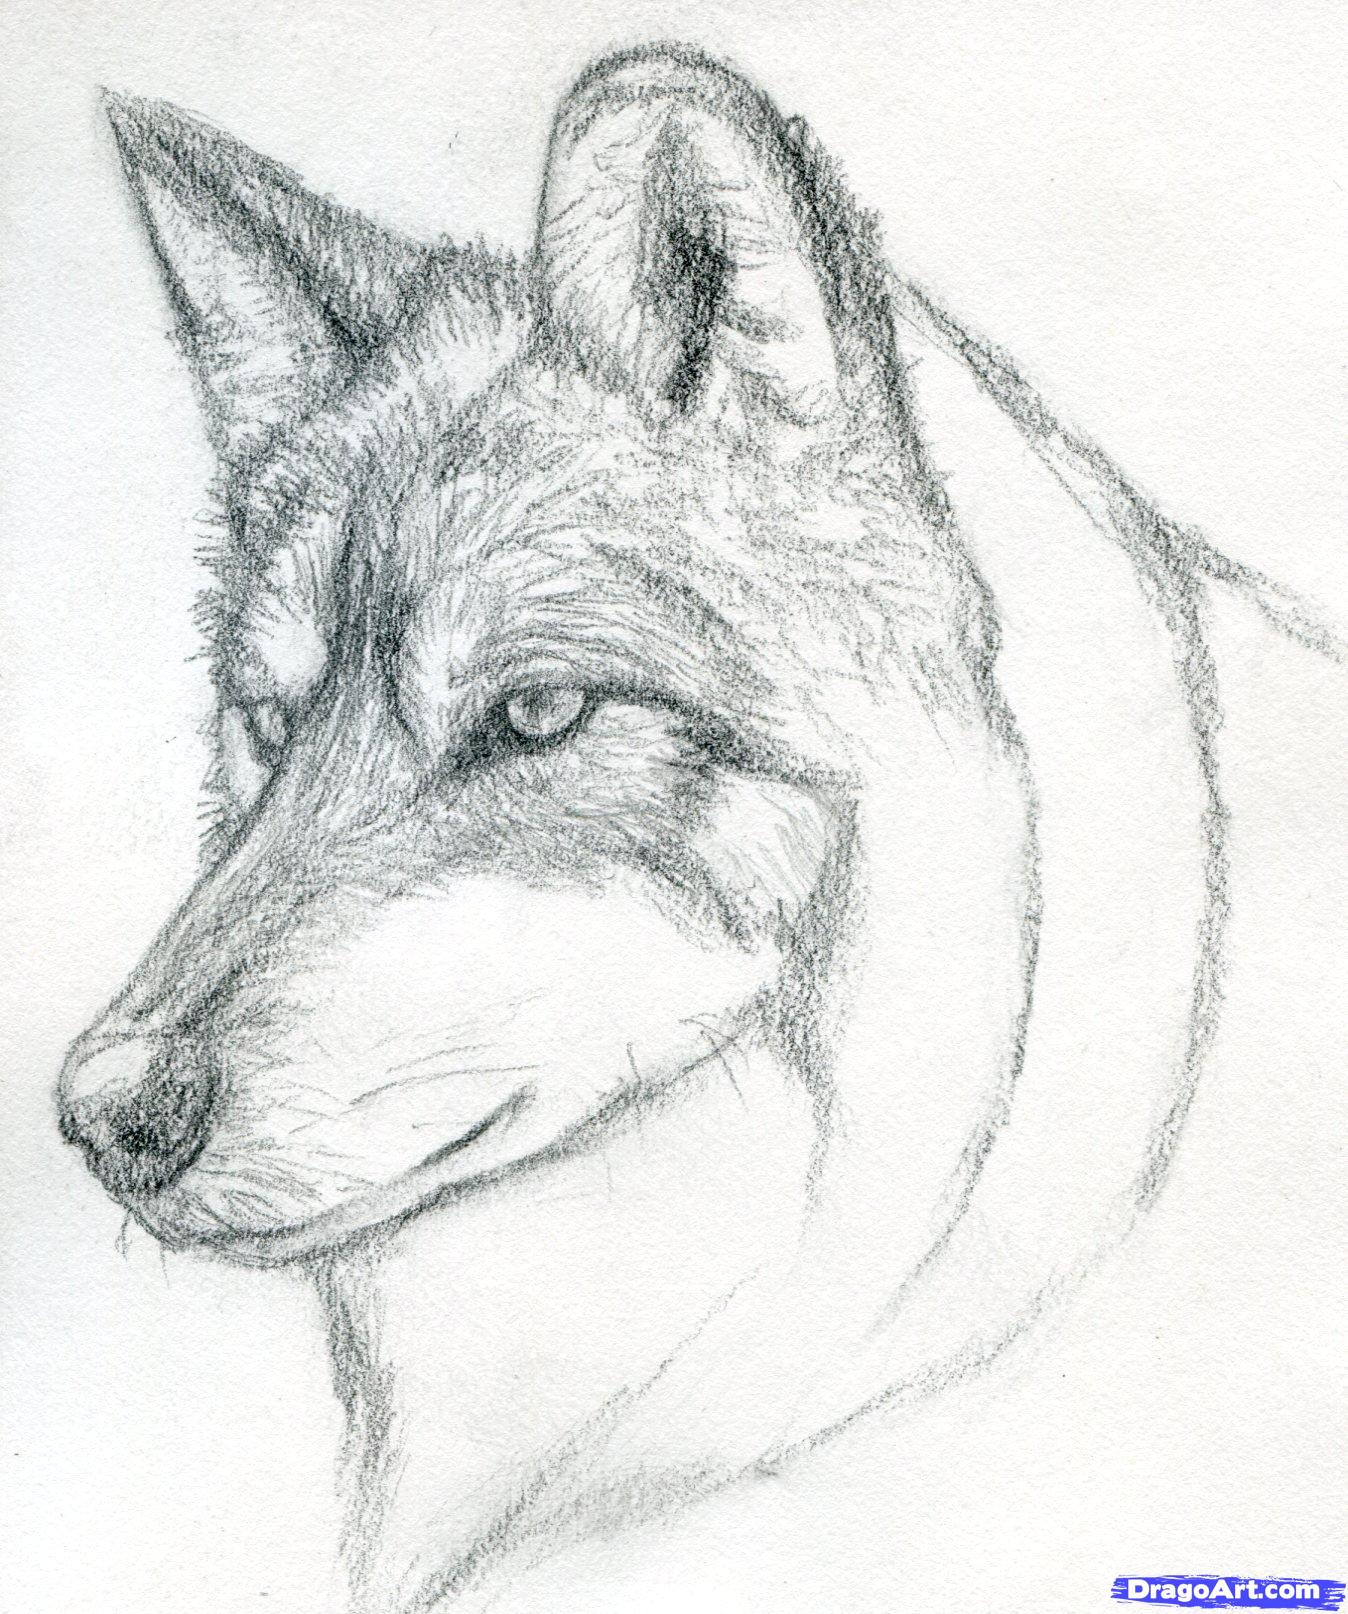
Understanding the Anatomy of a Wolf
To sketch a wolf convincingly, you need to understand its anatomy. Wolves have a lean, muscular build with a narrow chest and long legs. Their heads are wedge-shaped, with a prominent snout and triangular ears. Pay close attention to the curvature of their spine, which is slightly arched, and the way their tail flows seamlessly from the body. These anatomical details are key to creating a realistic wolf sketch.
Why Is Fur Texture Important in a Wolf Sketch?
Fur texture adds depth and realism to your wolf sketch. Wolves have thick, layered fur that varies in length and density across their bodies. To replicate this, use short, controlled strokes to mimic the direction of the fur. Start with light strokes for the undercoat and gradually build up darker layers for the outer coat. This technique will give your sketch a lifelike appearance and make the fur look soft and tactile.
Step-by-Step Guide: How to Sketch a Wolf
Now that you’re familiar with the basics, let’s dive into a step-by-step guide on how to sketch a wolf. Follow these instructions to create a stunning wolf drawing:
Read also:Discover The Fascinating World Of The Dinosaur With 509 Teeth Unveiling Prehistoric Wonders
- Start with Basic Shapes: Begin by sketching simple shapes like ovals and rectangles to outline the wolf’s body and head. This will serve as the foundation for your drawing.
- Define the Proportions: Use light lines to establish the proportions of the wolf’s body, including the length of the legs and the position of the ears.
- Add Details: Gradually refine your sketch by adding facial features, such as the eyes, nose, and mouth. Pay attention to symmetry and alignment.
- Outline the Fur: Use short, flowing strokes to sketch the fur, following the natural direction of growth.
- Shade and Highlight: Add depth by shading areas like the underbelly and shadows. Use an eraser to create highlights on the fur.
What Are the Best Techniques for Shading a Wolf Sketch?
Shading is what brings a wolf sketch to life, adding dimension and realism. Cross-hatching, stippling, and blending are three effective techniques for shading. Cross-hatching involves layering intersecting lines to create shadows, while stippling uses small dots to build texture. Blending, on the other hand, smooths out transitions between light and dark areas. Experiment with these techniques to find what works best for your style.
How Can Layering Improve Your Shading?
Layering is a powerful tool for achieving depth in your shading. Start with light layers and gradually build up darker tones. This approach allows you to make adjustments as you go and prevents your sketch from looking flat or overworked. Use a blending stump to soften harsh lines and create seamless transitions.
How to Add Realism to Your Wolf Sketch?
Adding realism to your wolf sketch involves focusing on small details that make a big difference. Pay attention to the wolf’s eyes, which are often the focal point of the drawing. Use fine lines to capture the reflection and depth in the eyes. Additionally, emphasize the texture of the fur around the neck and shoulders, as this area tends to be thicker and more prominent.
Why Is Capturing Movement Important?
Wolves are dynamic creatures, and capturing their movement can elevate your sketch. Study how their bodies shift when they walk, run, or stand still. Incorporate these poses into your drawing to make it more engaging and lifelike.
Common Mistakes to Avoid When Sketching a Wolf
Even experienced artists can make mistakes when sketching a wolf. One common error is neglecting proportions, which can result in a distorted drawing. Another mistake is overworking the shading, leading to a muddy appearance. To avoid these pitfalls, take your time with each step and regularly compare your sketch to reference images.
How Can You Fix Proportion Errors?
If you notice proportion errors in your sketch, don’t panic. Use an eraser to lightly adjust the lines and re-establish the correct proportions. It’s better to make corrections early on than to continue building on a flawed foundation.
Frequently Asked Questions About Sketching a Wolf
What Is the Best Way to Practice Sketching a Wolf?
The best way to practice is by sketching regularly and studying reference images. Start with simple outlines and gradually add more detail as you gain confidence. You can also try sketching wolves in different poses to improve your versatility.
How Long Does It Take to Master Sketching a Wolf?
The time it takes to master sketching a wolf varies depending on your skill level and dedication. With consistent practice, you can see significant improvement in a few weeks or months.
Can I Use Digital Tools to Sketch a Wolf?
Absolutely! Digital tools like tablets and styluses offer flexibility and precision. Programs like Adobe Photoshop or Procreate allow you to experiment with layers and effects, making it easier to refine your sketch.
In conclusion, learning how to sketch a wolf is a journey that requires patience, practice, and a keen eye for detail. By following the steps outlined in this guide, you can create stunning wolf sketches that capture the essence of this magnificent creature. Remember, every artist starts somewhere, and with dedication, you’ll soon be sketching wolves with confidence and flair. For more tips and inspiration, check out ArtTutor, a fantastic resource for aspiring artists.