Winter is the perfect time to embrace creativity and enjoy hands-on projects with family and friends. One of the most exciting and eco-friendly DIY projects you can undertake is building your very own DIY cardboard sleigh. Whether you’re crafting it for a holiday decoration, a school project, or just for fun, this activity is sure to bring joy and a sense of accomplishment. Cardboard is a versatile, recyclable material that’s easy to work with, making it ideal for crafting projects of all kinds. With a little imagination and some basic tools, you can transform ordinary cardboard into a stunning sleigh that captures the magic of the season.
Building a DIY cardboard sleigh isn’t just about creating something beautiful—it’s also an opportunity to bond with loved ones while learning new skills. From cutting and shaping the cardboard to adding personalized decorations, every step of the process is a chance to express your creativity. Plus, this project is budget-friendly and environmentally conscious, as it repurposes materials you might otherwise discard. Whether you’re a seasoned crafter or a beginner, this guide will walk you through everything you need to know to create your own sleigh masterpiece.
Throughout this article, we’ll explore the step-by-step process of building a DIY cardboard sleigh, offer creative ideas for customization, and answer common questions about the project. You’ll also find tips for making your sleigh more durable and visually appealing. So, gather your supplies, roll up your sleeves, and get ready to embark on a crafting adventure that’s as rewarding as it is fun!
Read also:Why Everyone Loves Krabby Patties U Like Krabby Patties Dont U Squidward
Table of Contents
- Why Build a DIY Cardboard Sleigh?
- What Materials Do You Need for Your DIY Cardboard Sleigh?
- How to Build Your DIY Cardboard Sleigh
- Can You Make Your DIY Cardboard Sleigh More Durable?
- Creative Ideas for Customizing Your DIY Cardboard Sleigh
- How to Use Your DIY Cardboard Sleigh for Different Occasions?
- FAQs About DIY Cardboard Sleighs
- Conclusion
Why Build a DIY Cardboard Sleigh?
Building a DIY cardboard sleigh offers a multitude of benefits that go beyond simply creating a decorative piece. First and foremost, it’s an excellent way to foster creativity and encourage hands-on learning. Whether you’re working on this project alone or with family and friends, the process of designing and constructing a sleigh allows you to experiment with shapes, textures, and colors. This type of creative expression is not only fun but also helps develop problem-solving skills and spatial awareness.
Another compelling reason to build a DIY cardboard sleigh is its eco-friendly nature. Cardboard is a widely available and recyclable material, making it a sustainable choice for crafting projects. By repurposing old boxes or scraps, you’re reducing waste and contributing to a greener planet. This project also serves as a great teaching moment for children, helping them understand the importance of sustainability and resourcefulness.
Lastly, a DIY cardboard sleigh can serve multiple purposes. It can be used as a festive holiday decoration, a prop for school plays or events, or even a toy for imaginative play. Its versatility ensures that the effort you put into crafting it will be rewarded with endless possibilities for enjoyment. Whether you’re looking to create a centerpiece for your winter celebrations or simply want to try something new, building a DIY cardboard sleigh is a project that delivers both fun and value.
What Materials Do You Need for Your DIY Cardboard Sleigh?
Before diving into the construction process, it’s essential to gather all the necessary materials and tools for your DIY cardboard sleigh. Having everything prepared in advance will make the project smoother and more enjoyable. Here’s a comprehensive list of what you’ll need:
- Cardboard: The primary material for your sleigh. Look for sturdy, corrugated cardboard from boxes or packaging materials.
- Box Cutter or Craft Knife: For cutting the cardboard into precise shapes. Make sure to use a sharp blade for clean edges.
- Ruler or Measuring Tape: To ensure accurate measurements when designing and cutting the sleigh components.
- Hot Glue Gun and Glue Sticks: For assembling the sleigh and securing its parts together. Hot glue provides a strong bond and dries quickly.
- Duct Tape or Packing Tape: To reinforce joints and edges, adding durability to your sleigh.
- Paints, Brushes, and Markers: For decorating and personalizing your sleigh. Acrylic paints work well on cardboard and dry with a vibrant finish.
- Decorative Elements: Items like glitter, ribbons, stickers, or faux fur can add a festive touch to your sleigh.
- Scissors: For cutting smaller pieces or trimming excess material.
- Pencil: To sketch out your design and mark measurements on the cardboard.
Once you’ve gathered these materials, you’ll be ready to start building your DIY cardboard sleigh. Having a well-organized workspace and all your tools within reach will make the crafting process much more efficient. Remember, creativity is key, so feel free to adapt the materials list based on what you have available or the specific design you envision for your sleigh.
How to Build Your DIY Cardboard Sleigh
Step 1: Designing the Sleigh
The first step in building your DIY cardboard sleigh is creating a design that suits your vision. Start by sketching a rough outline of the sleigh on paper. Consider the size you want it to be—whether it’s a small decorative piece or a larger sleigh for play or display. Think about the sleigh’s proportions, ensuring the base, sides, and backrest are balanced and visually appealing. You can find inspiration online or create a unique design that reflects your personal style.
Read also:Victoria Principal Insights Into Family Life And Her Childrens Journey
Once you’re satisfied with your sketch, transfer the design onto the cardboard. Use a pencil and ruler to mark the dimensions for each part of the sleigh, including the base, side panels, backrest, and any additional decorative elements like runners or handles. Double-check your measurements to ensure everything will fit together properly. Precision at this stage will save you time and frustration later on.
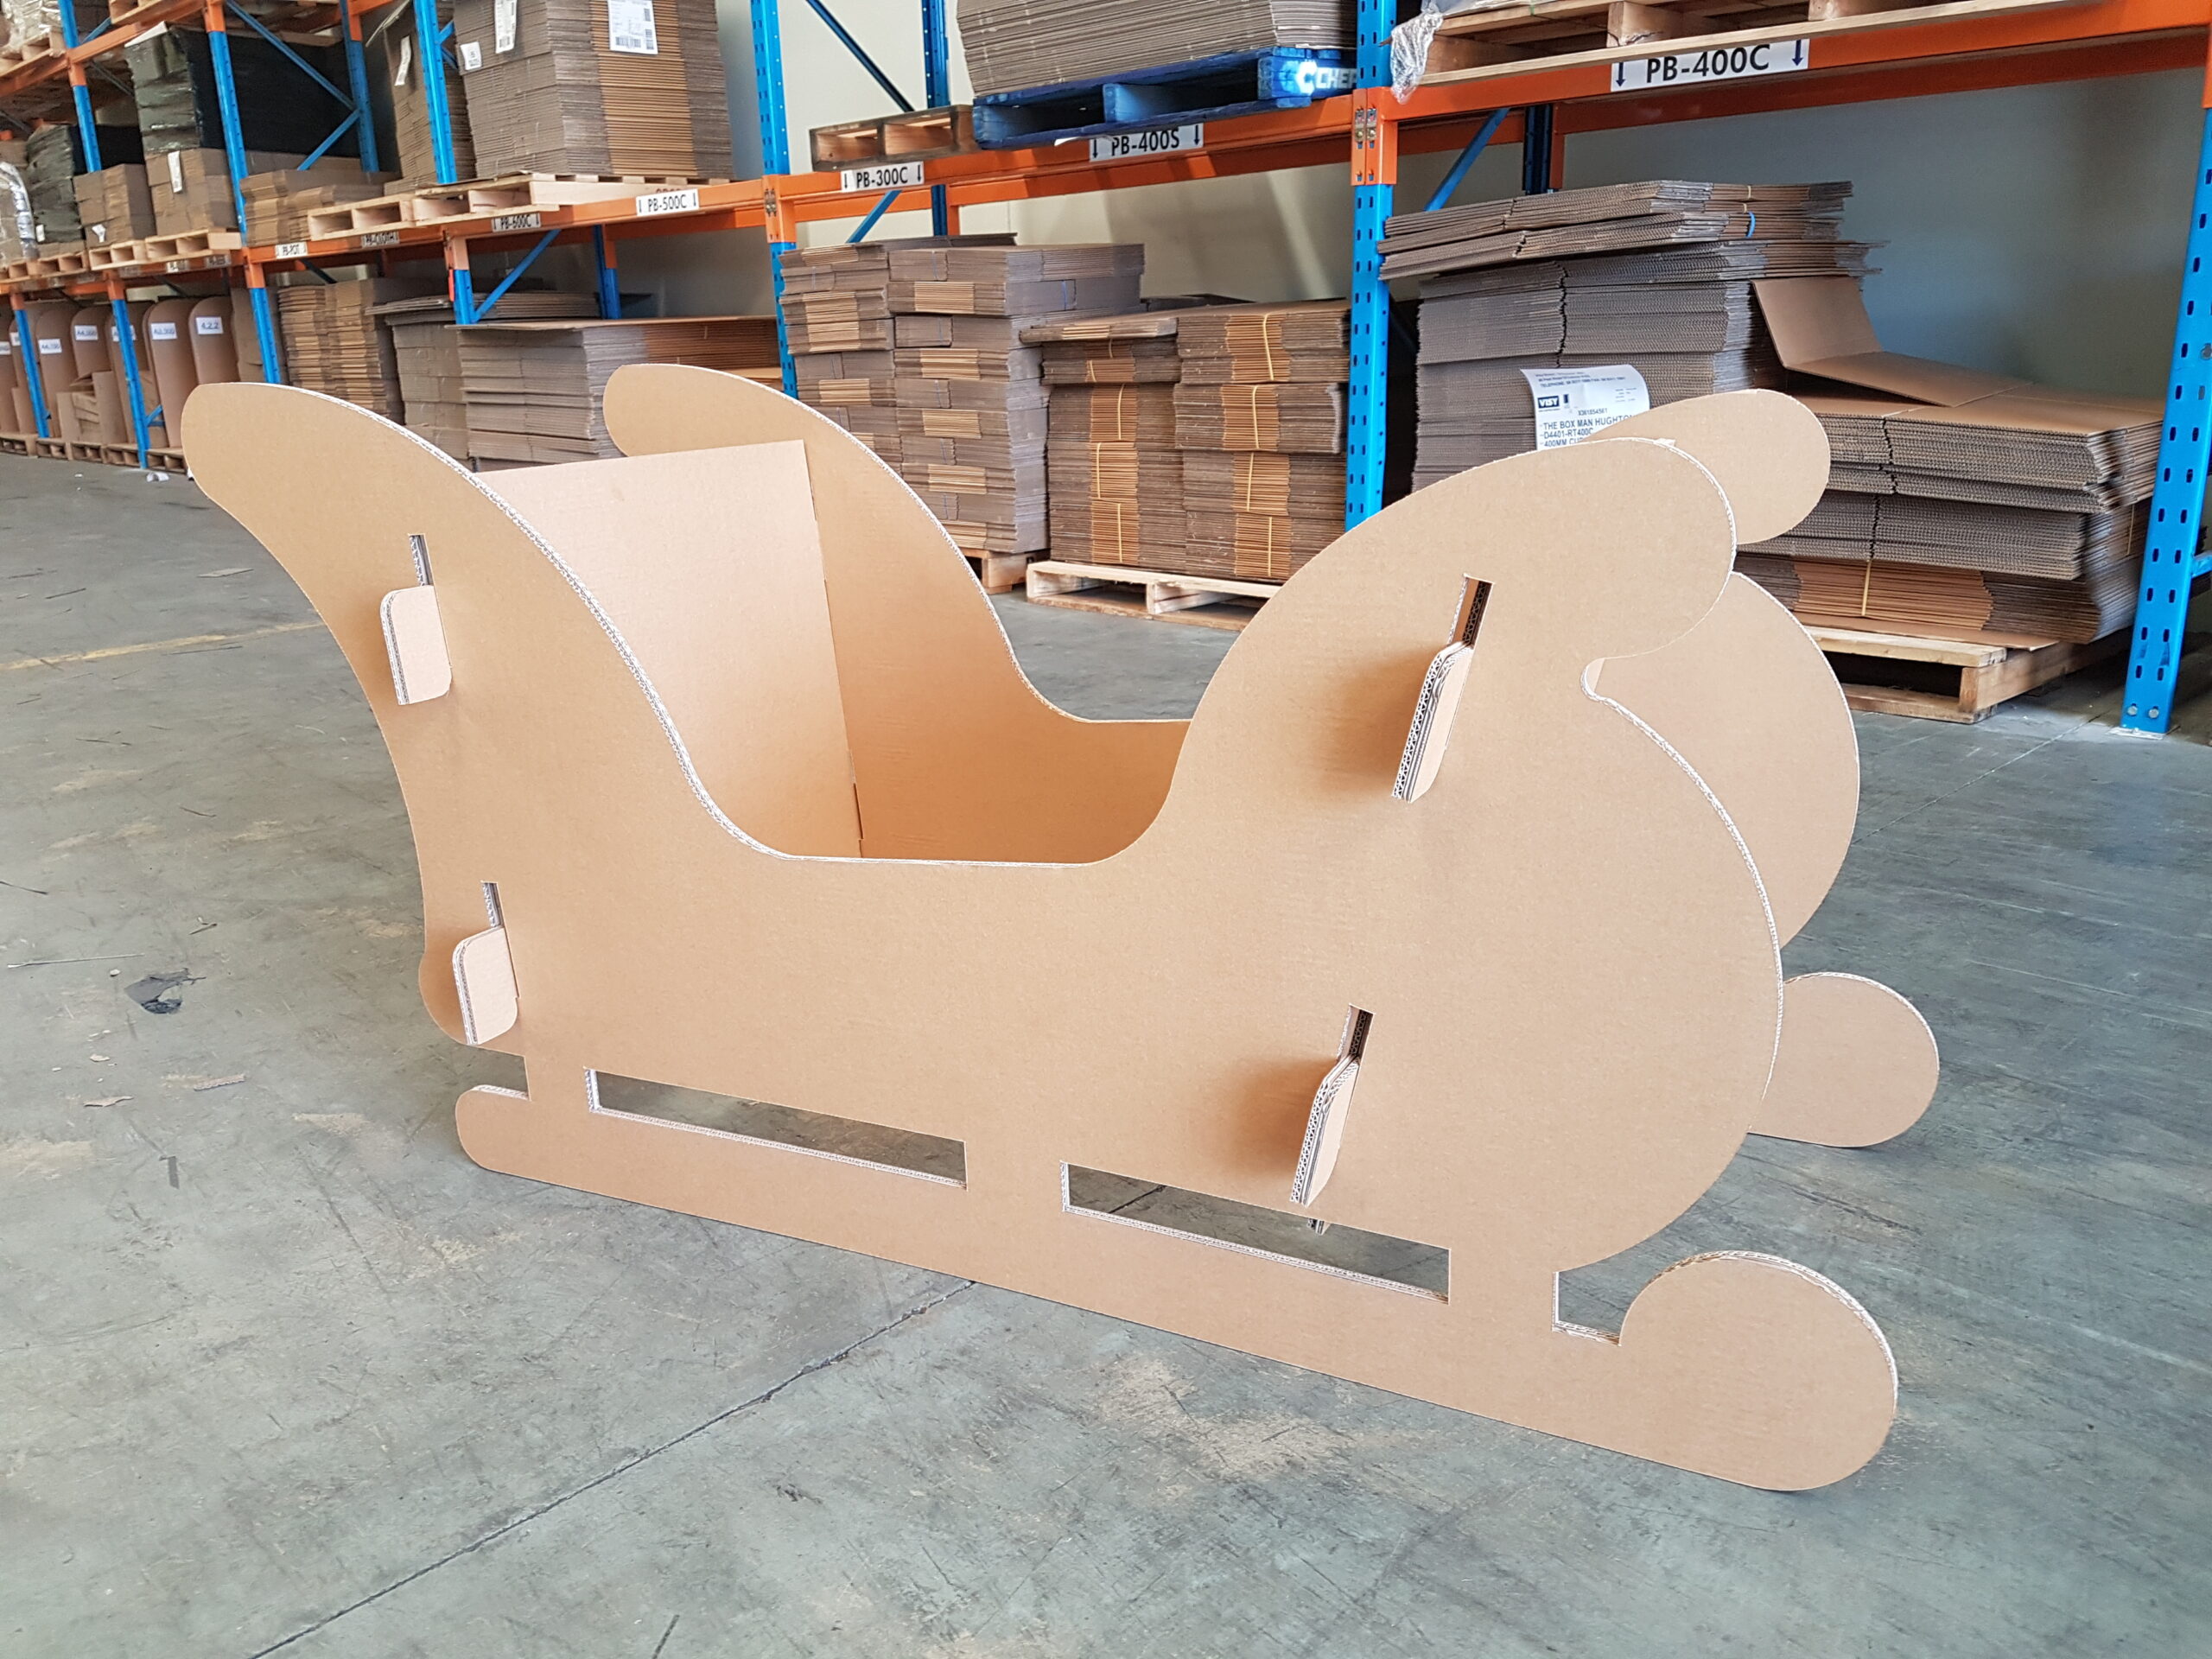
Step 2: Cutting and Assembling
With your design mapped out, it’s time to cut the cardboard pieces. Use a box cutter or craft knife to carefully cut along the marked lines. Take your time to ensure clean, straight edges, as this will make assembly easier and improve the overall appearance of your sleigh. If you’re working with children, supervise this step to ensure safety.
Once all the pieces are cut, begin assembling the sleigh. Start by attaching the side panels to the base using a hot glue gun. Reinforce the joints with duct tape or packing tape for added strength. Next, attach the backrest and any additional elements like runners or decorative accents. Make sure everything is securely fastened before moving on to the next step. At this point, your sleigh should start taking shape and look like a cohesive structure.
Can You Make Your DIY Cardboard Sleigh More Durable?
While cardboard is a fantastic material for crafting, it’s not inherently durable. However, with a few simple techniques, you can significantly enhance the strength and longevity of your DIY cardboard sleigh. One effective method is to layer multiple pieces of cardboard together. For example, when constructing the base or side panels, glue two or three layers of cardboard to create a sturdier structure. This added thickness will make the sleigh more resistant to wear and tear.
Another way to boost durability is by applying a protective coating. A mixture of white glue and water (often referred to as “paper mache paste”) can be brushed onto the surface of the sleigh. Once dried, this coating creates a hard shell that shields the cardboard from moisture and minor impacts. Alternatively, you can use a clear acrylic sealer spray for a quick and easy protective layer. This step is especially important if you plan to use the sleigh outdoors or in high-traffic areas.
Finally, reinforce critical stress points, such as corners and edges, with additional tape or glue. These areas are prone to wear, so giving them extra attention will help prolong the sleigh’s lifespan. By incorporating these techniques, you can ensure your DIY cardboard sleigh remains intact and functional for many seasons to come.
Creative Ideas for Customizing Your DIY Cardboard Sleigh
One of the most exciting aspects of building a DIY cardboard sleigh is the opportunity to customize it. Personalizing your sleigh allows you to showcase your creativity and make it truly unique. Start by choosing a color scheme that matches your theme or decor. For a classic winter look, opt for shades of white, silver, and blue. If you’re aiming for a cozy holiday vibe, consider using red, green, and gold accents.
Once you’ve painted the base, add intricate details to elevate the design. Use markers or metallic paints to create patterns like snowflakes, holly leaves, or reindeer silhouettes. You can also glue on decorative elements like ribbons, beads, or faux fur to give the sleigh a luxurious feel. For example, lining the edges with faux fur can mimic the look of a traditional sleigh, while adding glitter or sequins can make it sparkle like fresh snow.
To take customization a step further, consider incorporating functional features. For instance, attach small hooks or handles to make the sleigh easier to carry. If you’re using it as a prop for a holiday display, add LED string lights or battery-operated candles to create a warm, glowing effect. These creative touches not only enhance the sleigh’s appearance but also make it more versatile for different uses.
How to Use Your DIY Cardboard Sleigh for Different Occasions?
A DIY cardboard sleigh is a versatile creation that can be used in a variety of ways depending on the occasion. During the holiday season, it makes a fantastic centerpiece for your winter decor. Place it near the fireplace, under the Christmas tree, or on a mantelpiece, and fill it with festive items like wrapped gifts, pinecones, or ornaments. This adds a charming touch to your home and creates a cozy atmosphere for family gatherings.
For school or community events, a DIY cardboard sleigh can serve as a prop in plays, photo booths, or craft fairs. Its lightweight and portable nature make it easy to transport and set up. Encourage children to use it for imaginative play, pretending it’s Santa’s sleigh or a magical vehicle for winter adventures. You can even organize a sleigh-decorating contest to spark creativity and friendly competition.
Outside of the holidays, your sleigh can still find purpose. Use it as a unique storage solution for blankets, books, or toys. Alternatively, repurpose it as a garden planter by lining the interior with plastic and filling it with soil and plants. With a little creativity, your DIY cardboard sleigh can remain a cherished and functional part of your home year-round.
FAQs About DIY Cardboard Sleighs
What Tools Are Essential for Building a DIY Cardboard Sleigh?
Building a DIY cardboard sleigh requires a few basic tools to ensure precision and safety. A box cutter or craft knife is essential for cutting the cardboard, while a ruler or measuring tape helps with accurate measurements. A hot glue gun and duct tape are also crucial for assembling and reinforcing the sleigh’s structure.
How Long Does It Take to Build a DIY Cardboard Sleigh?
The time required to build a DIY cardboard sleigh depends on its complexity and your crafting experience. On average, a simple sleigh can take 2-4 hours to complete, including design, cutting, assembly, and decoration. More intricate designs may take longer, but the process is enjoyable and rewarding.
Can Children Help with Building a